OK, well I have my fans installed and running in my Wineador! I was VERY lost as stripping wires/soldering/etc isn't my thing usually. With the help of the brothers on this forum, especially @Zmilin I was able to do this project very quickly and cleanly. I figured I'd post a tutorial here so brothers who are as lost as I was when I started have a place to look and see this process step by step. Some of you guys may be thinking that this is stupid easy, no need for a tutorial, and you'd be right at the stupid easy part, but I wish a tutorial was available when I was looking into how to do this! Anyways, here we go.
Supplies (really anything will work, this is just what I purchased) :
2 PC slot fans (regular CPU fans will work but having the air go up the back of the wino is better as it won't get stopped by your shelves and drawers if using CPU fans.) : http://www.amazon.com/gp/product/B000HRNCJW?psc=1&redirect=true&ref_=oh_aui_detailpage_o01_s00
1 12V AC adapter : (12 volts because these fans run on 12V) http://www.amazon.com/gp/product/B00AO0772A?psc=1&redirect=true&ref_=oh_aui_detailpage_o02_s00
1 7 day timer with 20 on/off settings per 24 hours : http://www.amazon.com/gp/product/B006LYHEEY?psc=1&redirect=true&ref_=oh_aui_detailpage_o02_s00
Wire cutter/Stripper
Soldering iron/wire nuts/anything that will keep the splices together neatly
Electrical tape
Heat Shrink (optional)
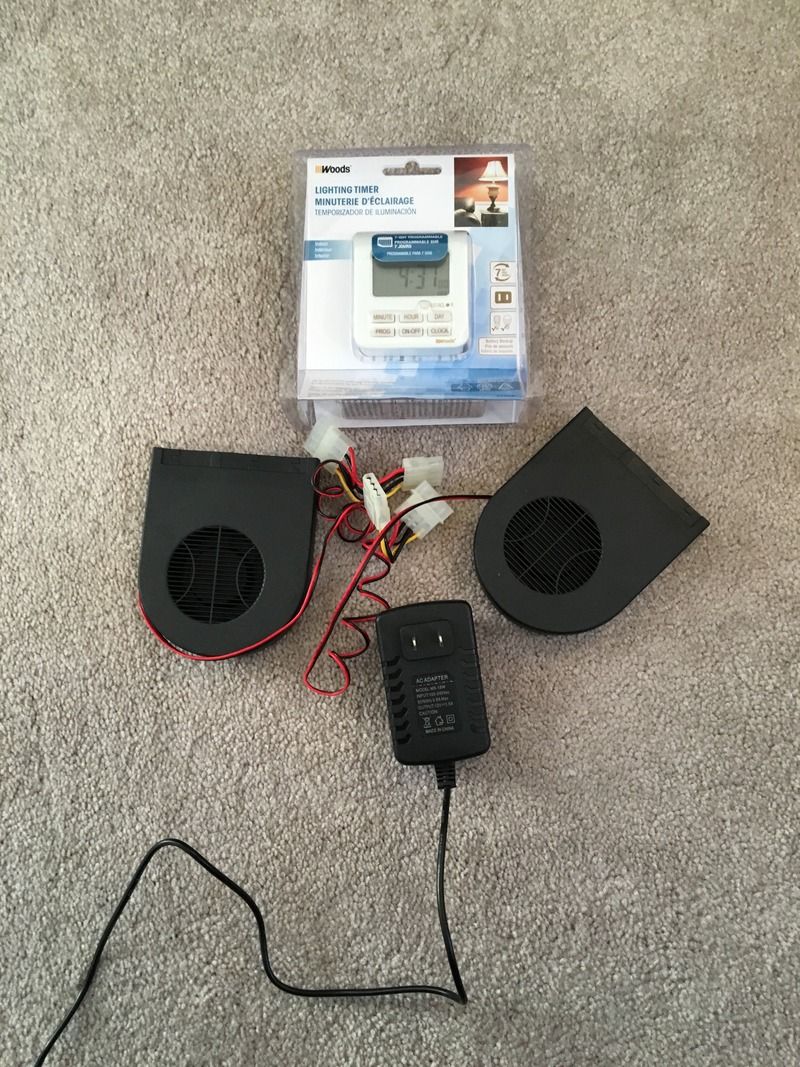
1) Gather all supplies
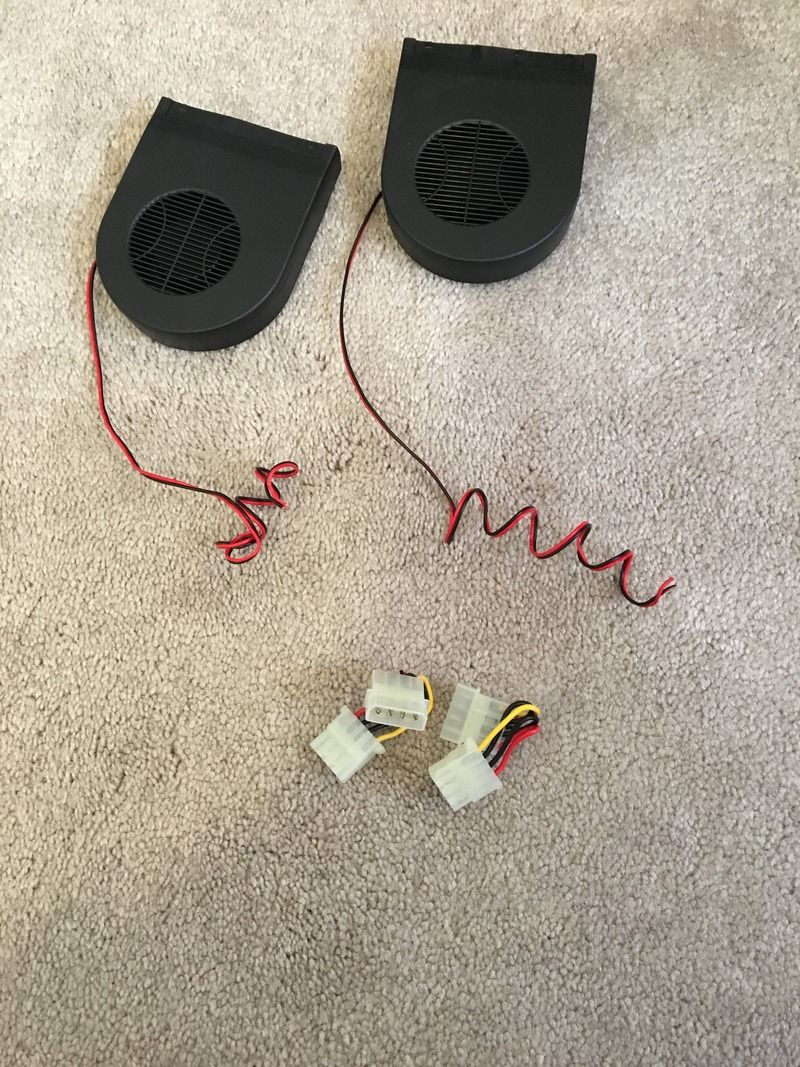
2) Cut off plugs from fans. All you need is the red/black wires coming off of the fans:
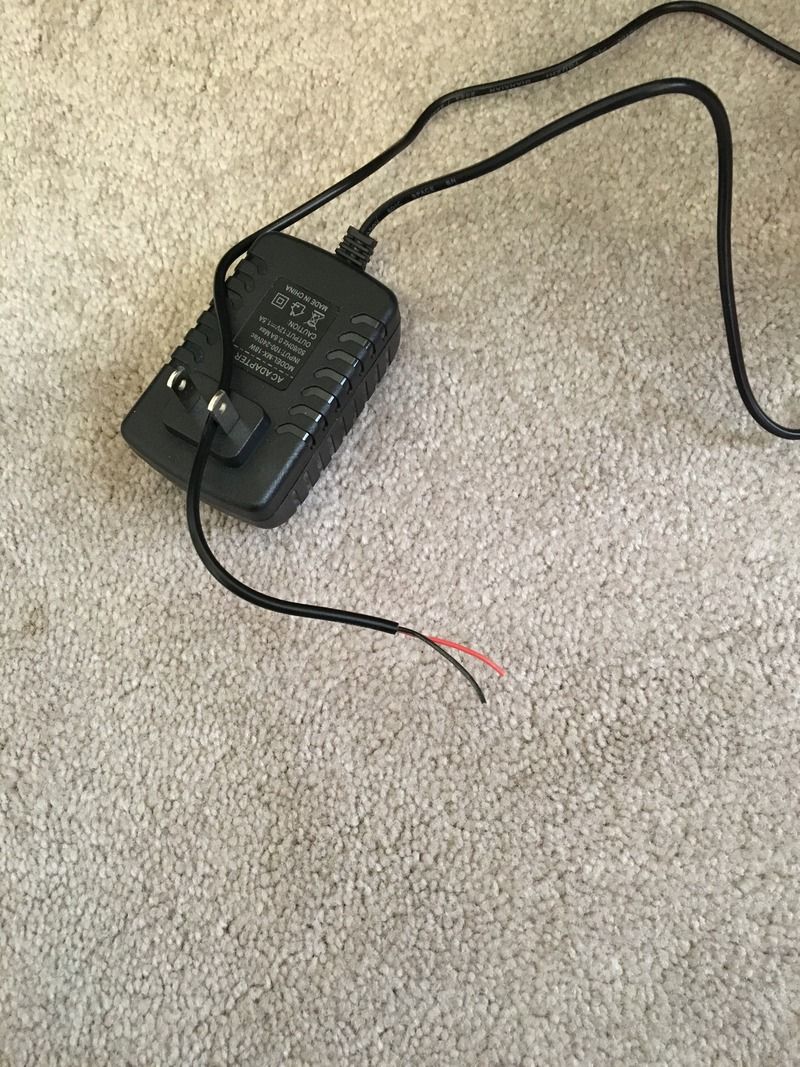
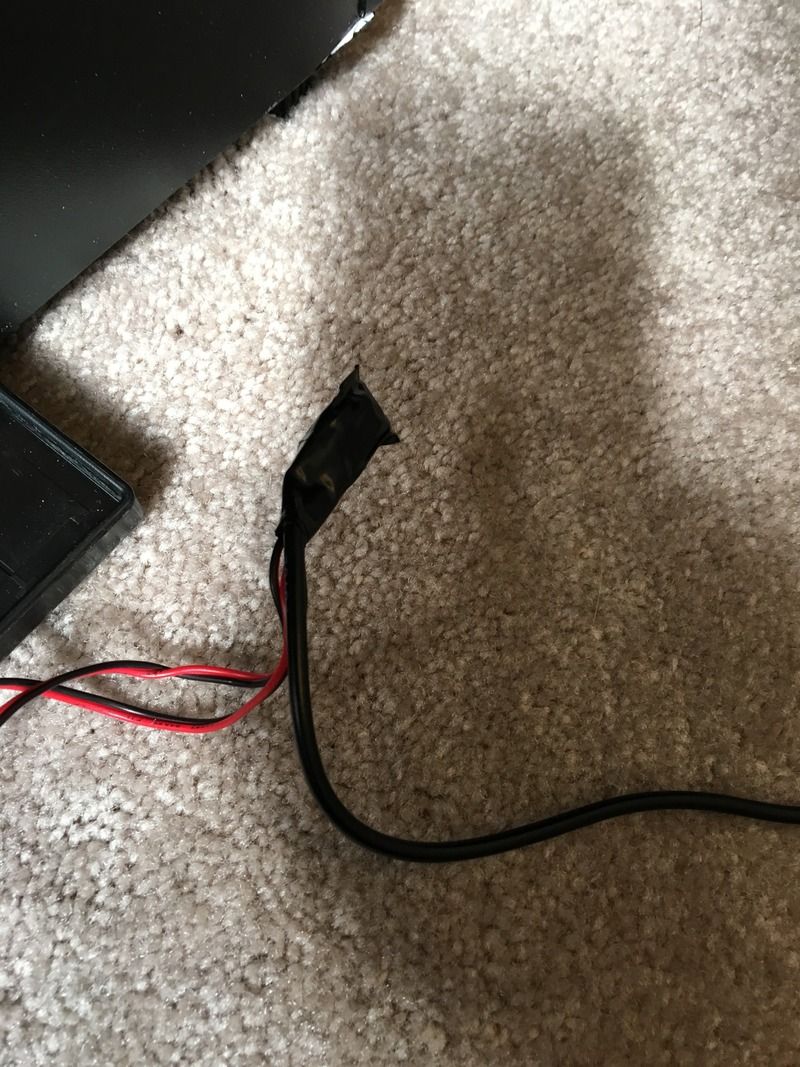
3) Cut the adapter off of the power supply and strip the big casing off exposing 2 wires (one red/one black) :
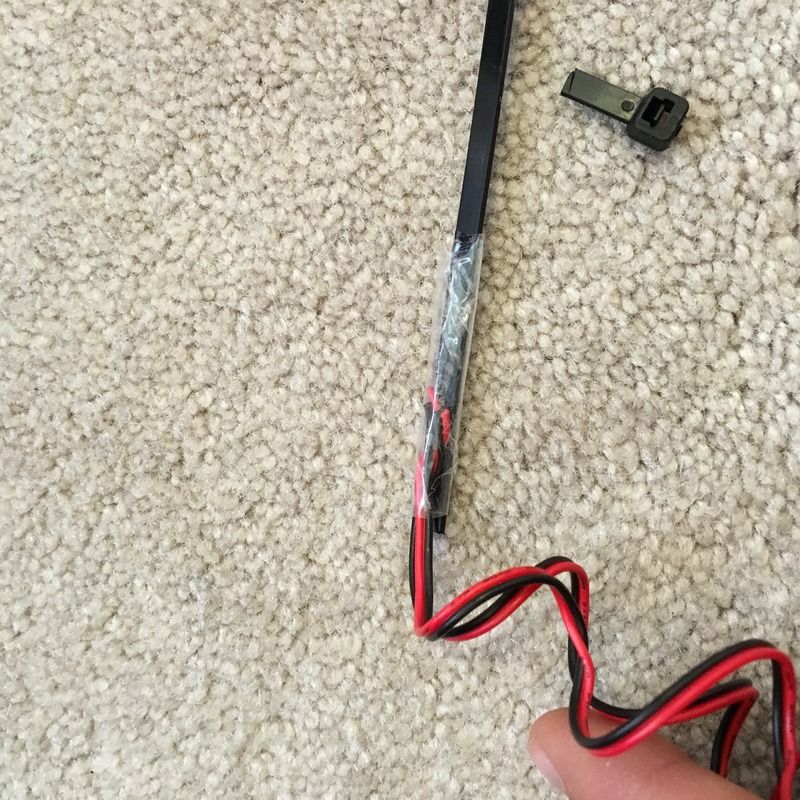
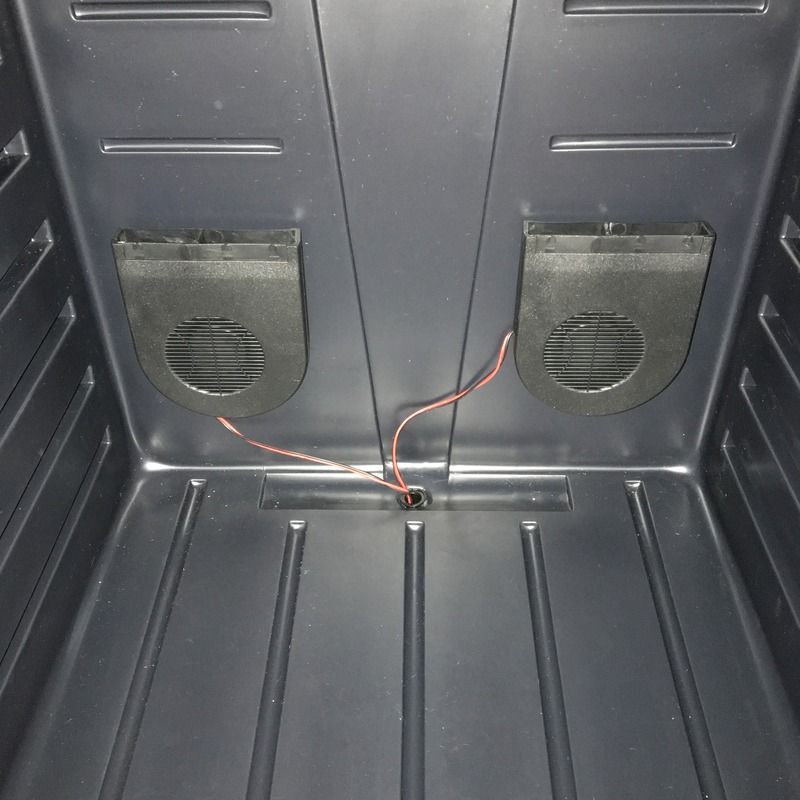
4) Run the fan wires through the drain hole and out of the back of the cooler. I used a zip tie and taped the wires to it. NOTE : cut off the "knob" at the end of the zip tie as it won't fit through the drain hole easily. It took me a few tries to realize this. Don't be like me.") Once through, I lost the tape connection but the wires made it through, so I just used some pliers to grab the wires and feed them out the rest of the way:
Once through, I lost the tape connection but the wires made it through, so I just used some pliers to grab the wires and feed them out the rest of the way:
5) Strip the ends of the fan wires and the ends of the adapter wires, then twist all three red wires together and all three black wires together:

6) Before going any further, test your connections! Plug in the AC adapter and make sure both fans start running. They should.
7) Solidify your connections. Once you are certain your fans work as they should, permanently connect the wiring. I chose to solder the wires and then use electrical tape. You can also use wire nuts, or crimp them together. All I had was solder so I used that:
8) Heat shrink and more tape (Optional). I chose to heat shrink both connections and then I taped both clusters of wires together so it looked a little cleaner:
9) Mount your fans. I wish I had double sided tape at home, but I didn't. I used packaging tape rolled over onto itself to make double sided tape You can use tape/velcro/whatever. Mount on the back wall to guarantee that air moves up the back of the wino:
10) Plug in your timer after programming, plug AC adapter into timer and you are done!
11) Enjoy the fact that you are cool and rest assured that RH will be evenly distributed at all times
TIMER CHEAT SHEET. Thank you once again @Zmilin for sending me this, I think it's awesome! Takes all the guess work out. Here it is for your viewing pleasure.
This allows you to program it to run all 20 segments and takes up a full 24 hour period with the fans running every hour for 12 minutes.
Setting On Off Duration
1 1:00 1:12 0:12
2 2:12 2:24 0:12
3 3:24 3:36 0:12
4 4:36 4:48 0:12
5 5:48 6:00 0:12
6 7:00 7:12 0:12
7 8:12 8:24 0:12
8 9:24 9:36 0:12
9 10:36 10:48 0:12
10 11:48 12:00 0:12
11 1:00 1:12 0:12
12 2:12 2:24 0:12
13 3:24 3:36 0:12
14 4:36 4:48 0:12
15 5:48 6:00 0:12
16 7:00 7:12 0:12
17 8:12 8:24 0:12
18 9:24 9:36 0:12
19 10:36 10:48 0:12
20 11:48 12:00 0:12
Well that's all I have. I hope this helps someone. Thank you again to all the brothers who helped me out. Thank you @Zmilin for your patience and help!! I wouldn't have done this without your guidance!
Supplies (really anything will work, this is just what I purchased) :
2 PC slot fans (regular CPU fans will work but having the air go up the back of the wino is better as it won't get stopped by your shelves and drawers if using CPU fans.) : http://www.amazon.com/gp/product/B000HRNCJW?psc=1&redirect=true&ref_=oh_aui_detailpage_o01_s00
1 12V AC adapter : (12 volts because these fans run on 12V) http://www.amazon.com/gp/product/B00AO0772A?psc=1&redirect=true&ref_=oh_aui_detailpage_o02_s00
1 7 day timer with 20 on/off settings per 24 hours : http://www.amazon.com/gp/product/B006LYHEEY?psc=1&redirect=true&ref_=oh_aui_detailpage_o02_s00
Wire cutter/Stripper
Soldering iron/wire nuts/anything that will keep the splices together neatly
Electrical tape
Heat Shrink (optional)
1) Gather all supplies

2) Cut off plugs from fans. All you need is the red/black wires coming off of the fans:

3) Cut the adapter off of the power supply and strip the big casing off exposing 2 wires (one red/one black) :

4) Run the fan wires through the drain hole and out of the back of the cooler. I used a zip tie and taped the wires to it. NOTE : cut off the "knob" at the end of the zip tie as it won't fit through the drain hole easily. It took me a few tries to realize this. Don't be like me.
Once through, I lost the tape connection but the wires made it through, so I just used some pliers to grab the wires and feed them out the rest of the way:


5) Strip the ends of the fan wires and the ends of the adapter wires, then twist all three red wires together and all three black wires together:

6) Before going any further, test your connections! Plug in the AC adapter and make sure both fans start running. They should.
7) Solidify your connections. Once you are certain your fans work as they should, permanently connect the wiring. I chose to solder the wires and then use electrical tape. You can also use wire nuts, or crimp them together. All I had was solder so I used that:

8) Heat shrink and more tape (Optional). I chose to heat shrink both connections and then I taped both clusters of wires together so it looked a little cleaner:


9) Mount your fans. I wish I had double sided tape at home, but I didn't. I used packaging tape rolled over onto itself to make double sided tape
You can use tape/velcro/whatever. Mount on the back wall to guarantee that air moves up the back of the wino:
10) Plug in your timer after programming, plug AC adapter into timer and you are done!
11) Enjoy the fact that you are cool and rest assured that RH will be evenly distributed at all times
TIMER CHEAT SHEET. Thank you once again @Zmilin for sending me this, I think it's awesome! Takes all the guess work out. Here it is for your viewing pleasure.
This allows you to program it to run all 20 segments and takes up a full 24 hour period with the fans running every hour for 12 minutes.
Setting On Off Duration
1 1:00 1:12 0:12
2 2:12 2:24 0:12
3 3:24 3:36 0:12
4 4:36 4:48 0:12
5 5:48 6:00 0:12
6 7:00 7:12 0:12
7 8:12 8:24 0:12
8 9:24 9:36 0:12
9 10:36 10:48 0:12
10 11:48 12:00 0:12
11 1:00 1:12 0:12
12 2:12 2:24 0:12
13 3:24 3:36 0:12
14 4:36 4:48 0:12
15 5:48 6:00 0:12
16 7:00 7:12 0:12
17 8:12 8:24 0:12
18 9:24 9:36 0:12
19 10:36 10:48 0:12
20 11:48 12:00 0:12
Well that's all I have. I hope this helps someone. Thank you again to all the brothers who helped me out. Thank you @Zmilin for your patience and help!! I wouldn't have done this without your guidance!